Build
Apps & pages
An app is the website or internal tool you build in Turbofy. It's made of pages — the screens people visit — and each page is arranged from building blocks. Apps run right inside the dashboard, and public ones can be published as a live website.
Apps, pages & blocks
Three simple pieces stack together: an app contains pages, and each page is made of blocks. The blocks show data from your tables, so your app always reflects your latest records.
App                 ← your website or tool
└── Page            ← one screen, with its own web address
    └── Block       ← a section on the page (list, form, header…)
This documentation site is itself a Turbofy app — a set of pages, each built from one content block.
Creating an app
The Apps screen shows every app in the current workspace as a card — its accent colour, when it was last updated, whether it is published, and the address it is reachable at. Click New App, give it a name, pick an accent colour, and confirm with Create.
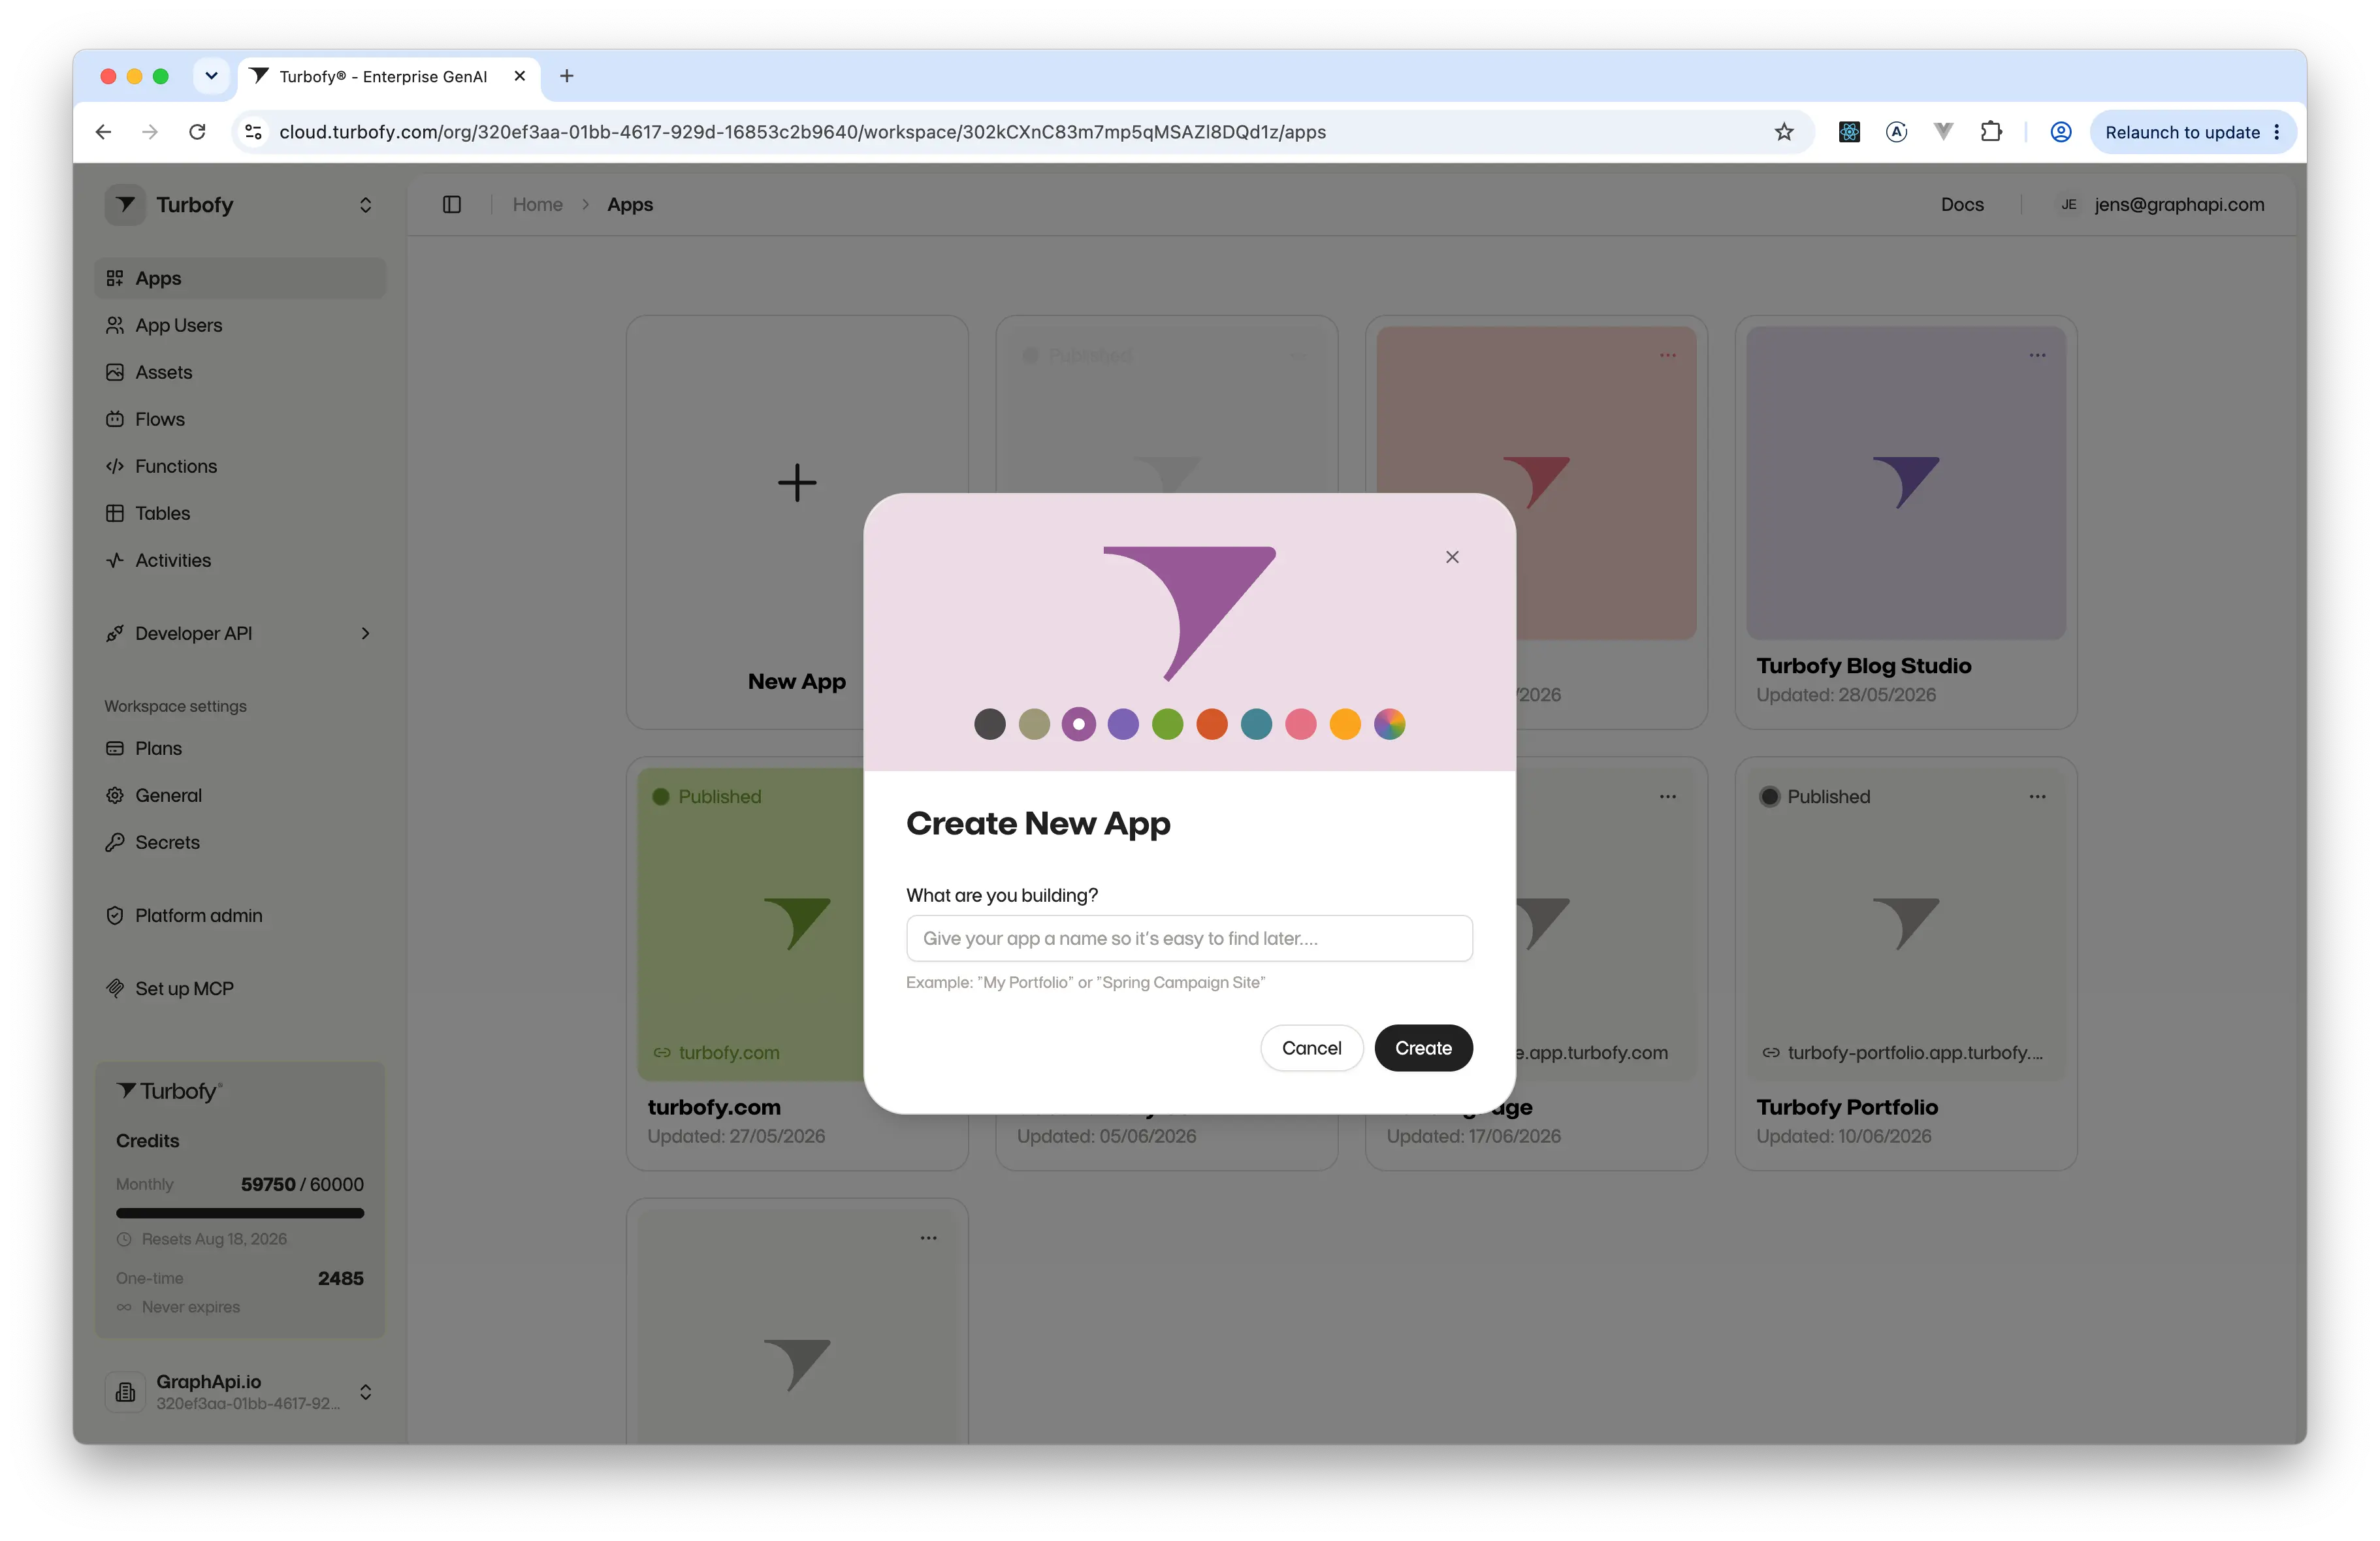
New App opens the create dialog.The accent colour is purely for the dashboard: it tints the app's card so you can pick it out of a long list at a glance.
Preview mode
Clicking an app's card opens it in preview — the app itself, running inside Turbofy behind a slim breadcrumb bar. Every block is live and reading real workspace data, so this is the app exactly as the people using it will see it.
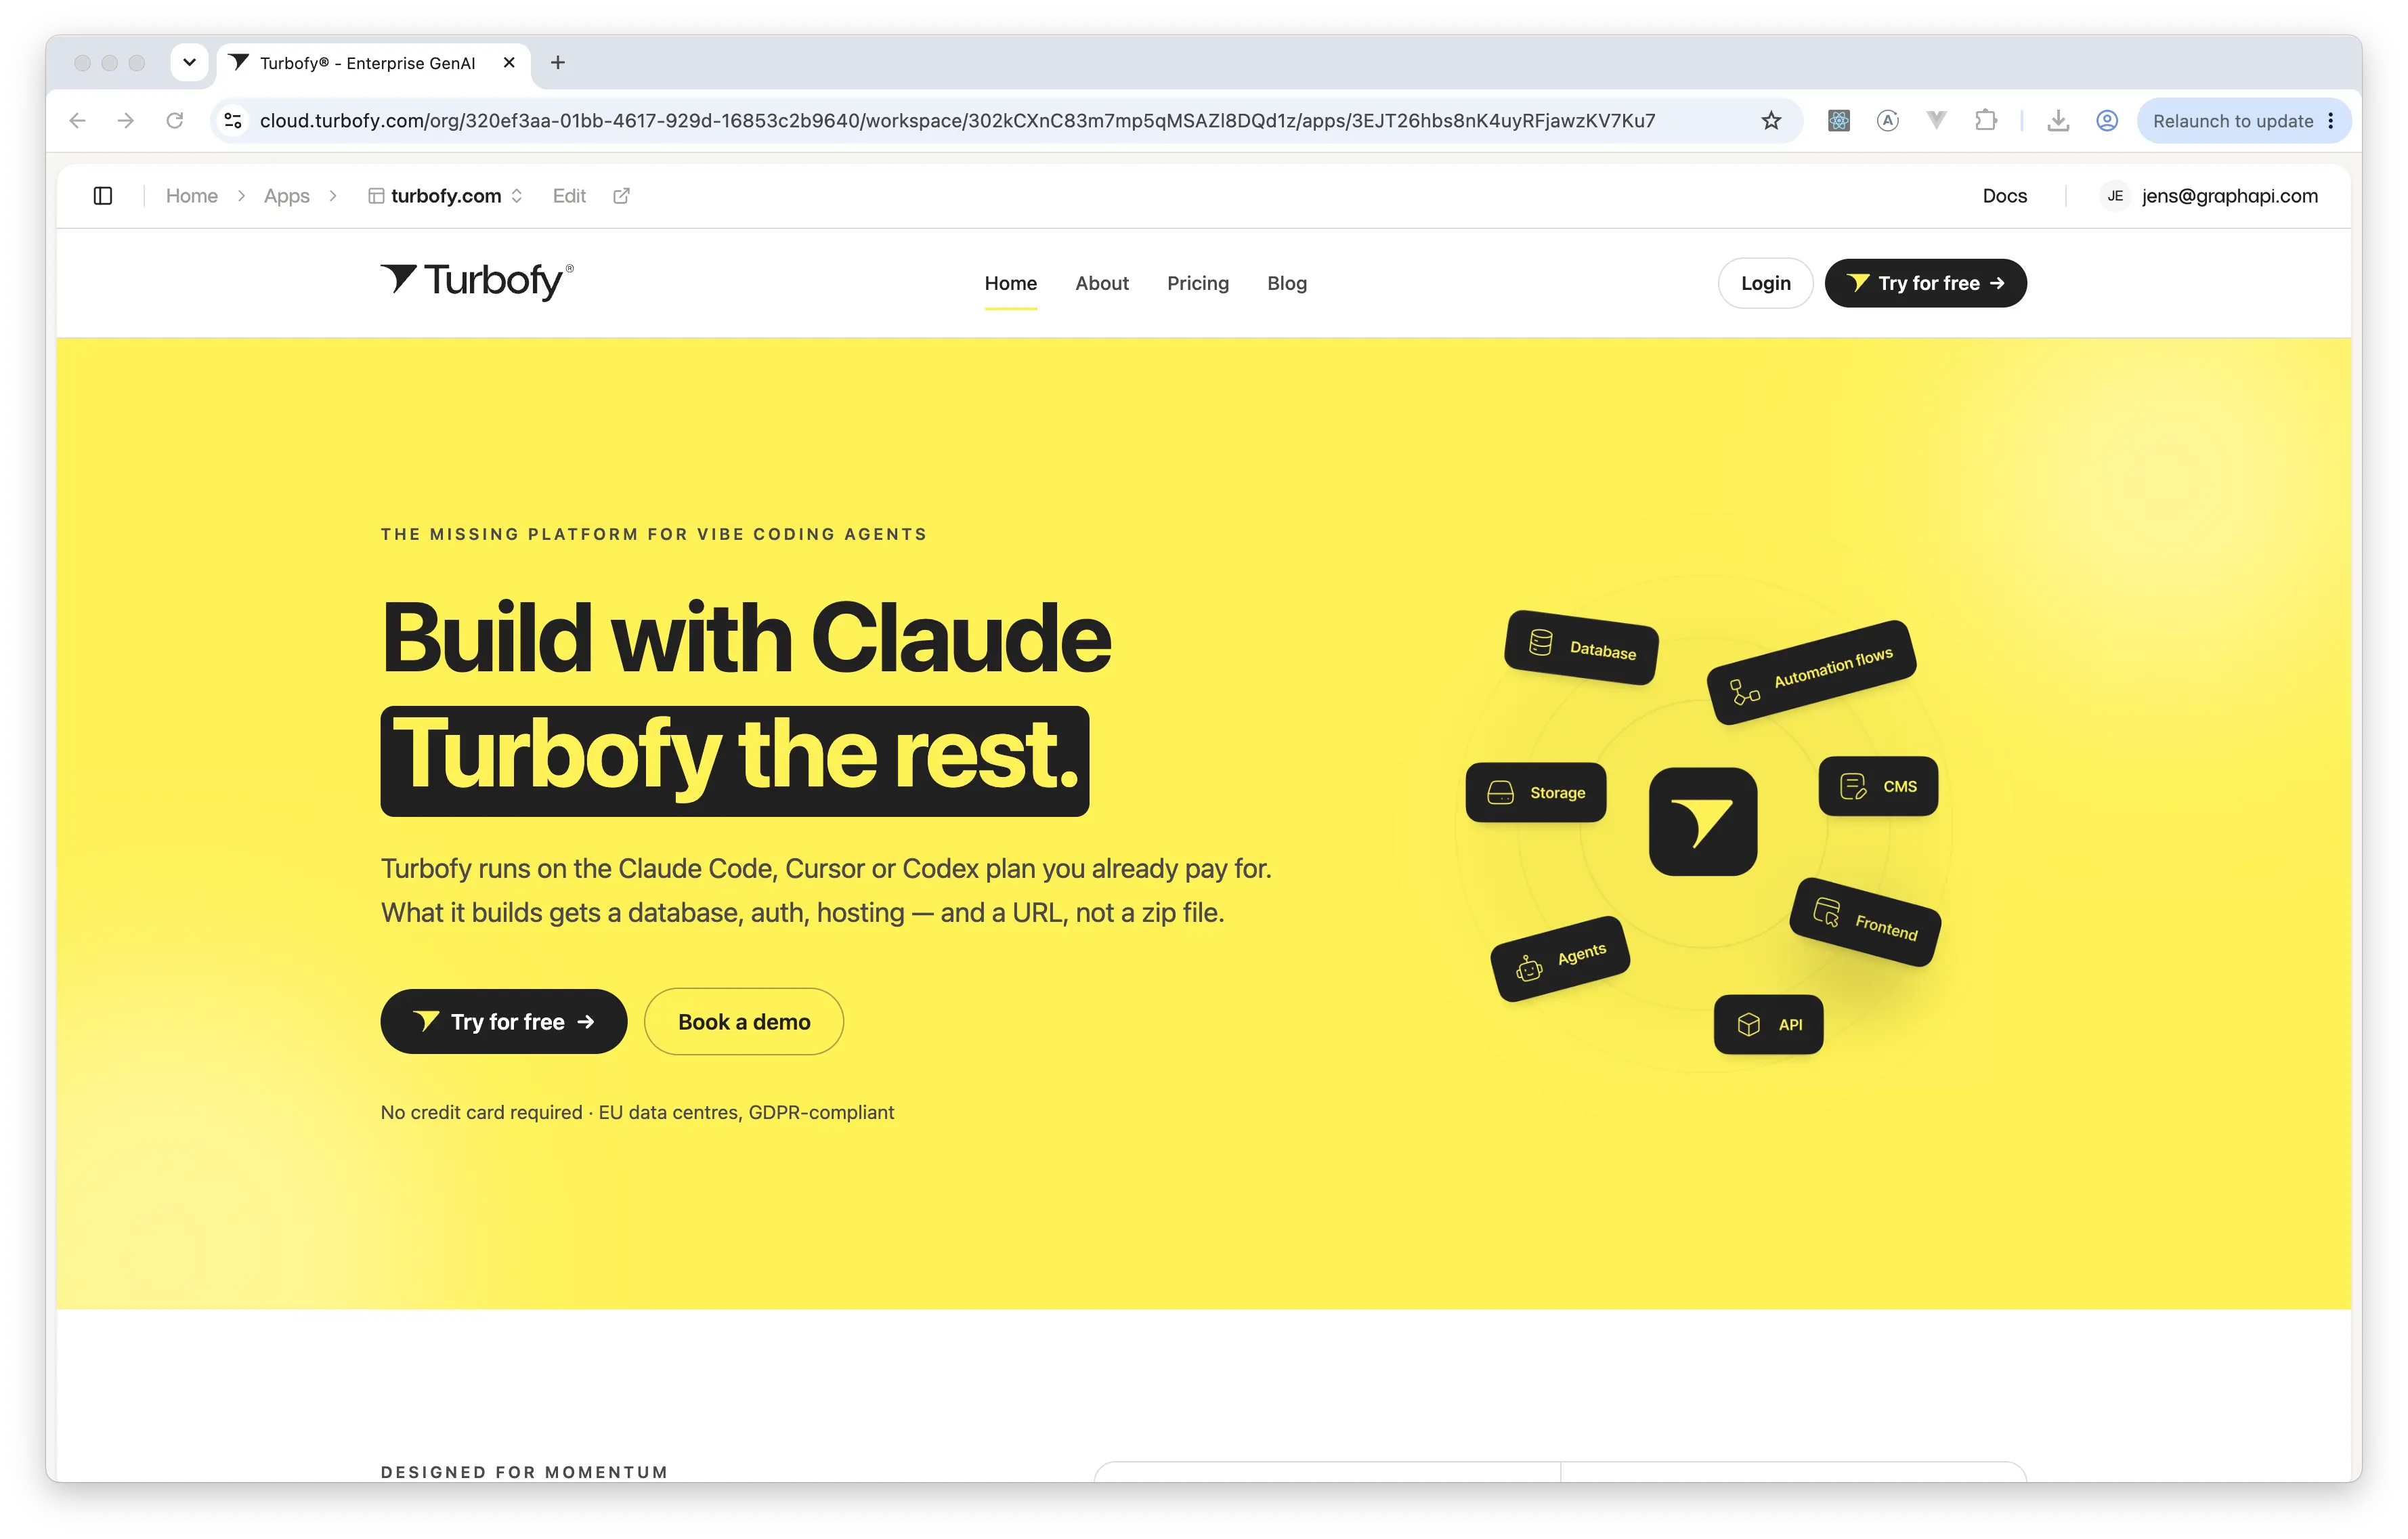
That makes preview more than a last look before publishing. An app you never want on the public web — a sales CRM, an ops dashboard, anything internal — can simply live here: your team opens it from the dashboard, it reads your workspace data directly, and nothing is exposed to the outside world.
Editin the breadcrumb takes you from preview into the editor.- The play button in the editor's toolbar brings you back, opening the page you were just editing.
The app editor
Because a card opens preview, the editor has its own way in: open the ⋯ menu on the app's card and choose Open Editor. The same menu renames and deletes the app.
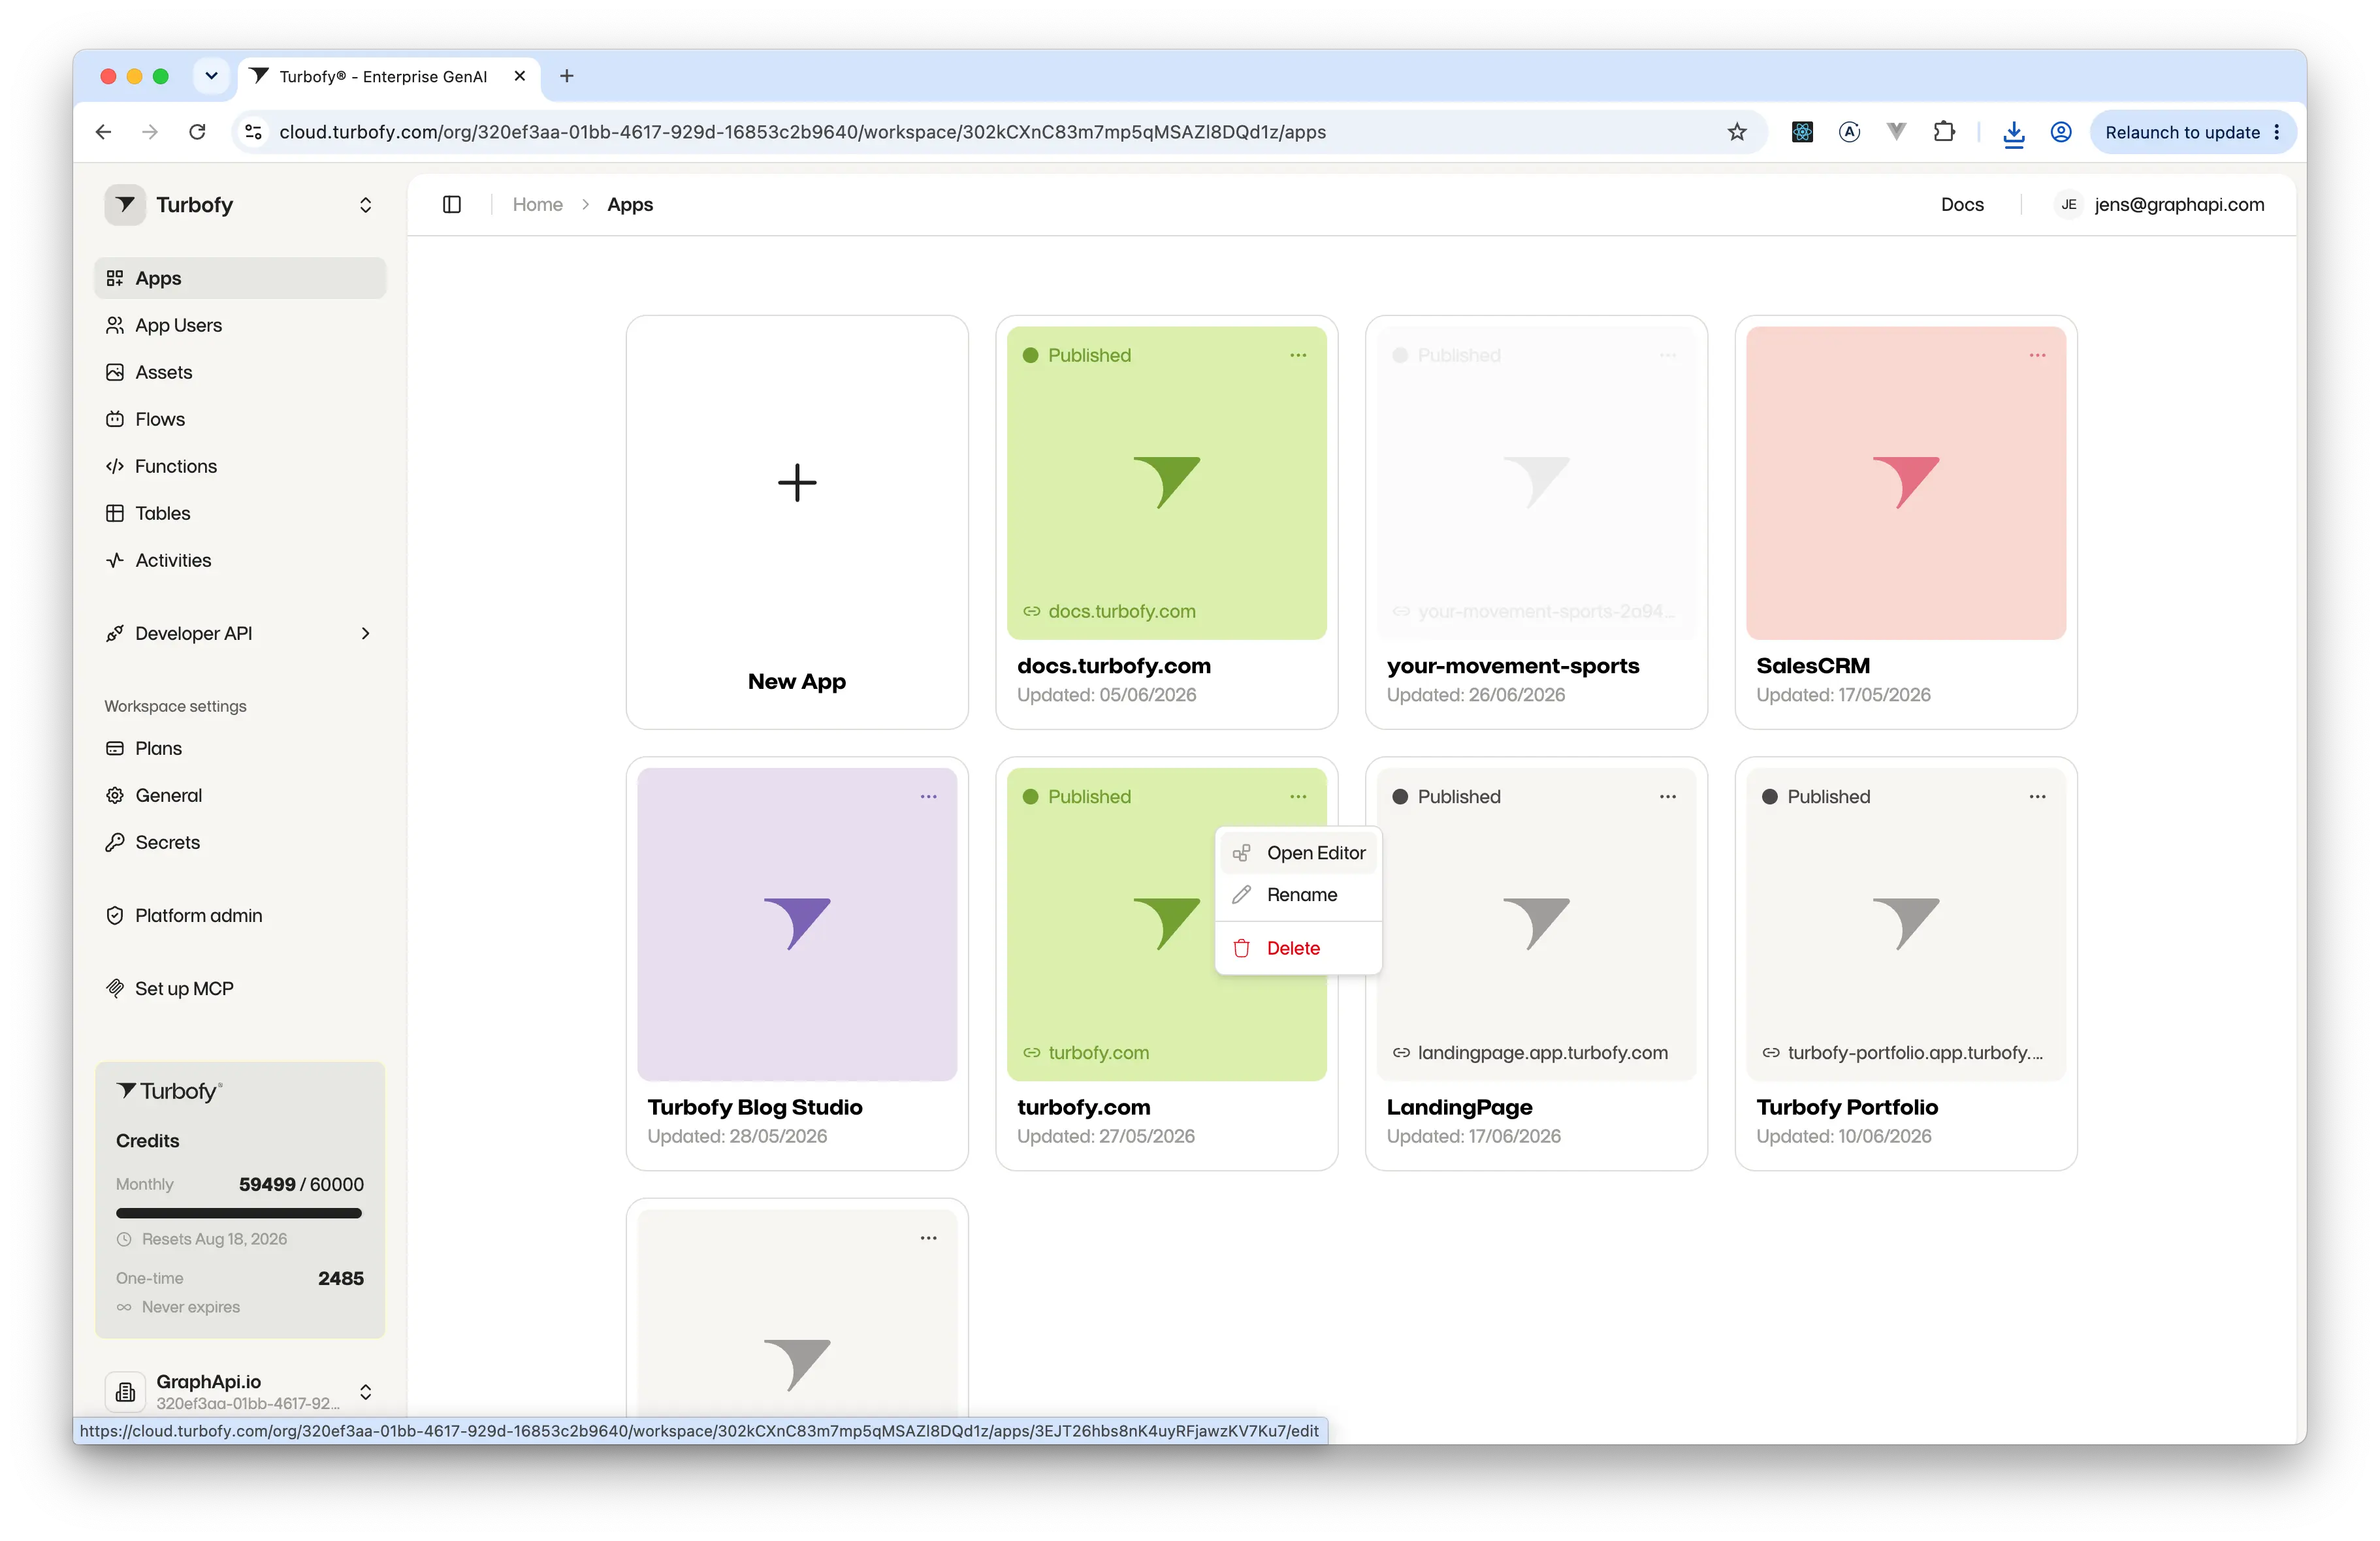
Open Editor on the card menu — clicking the card itself goes to preview.The editor puts a live rendering of the current page in the middle, the page switcher along the top, and an inspector on the right for whatever you have selected.
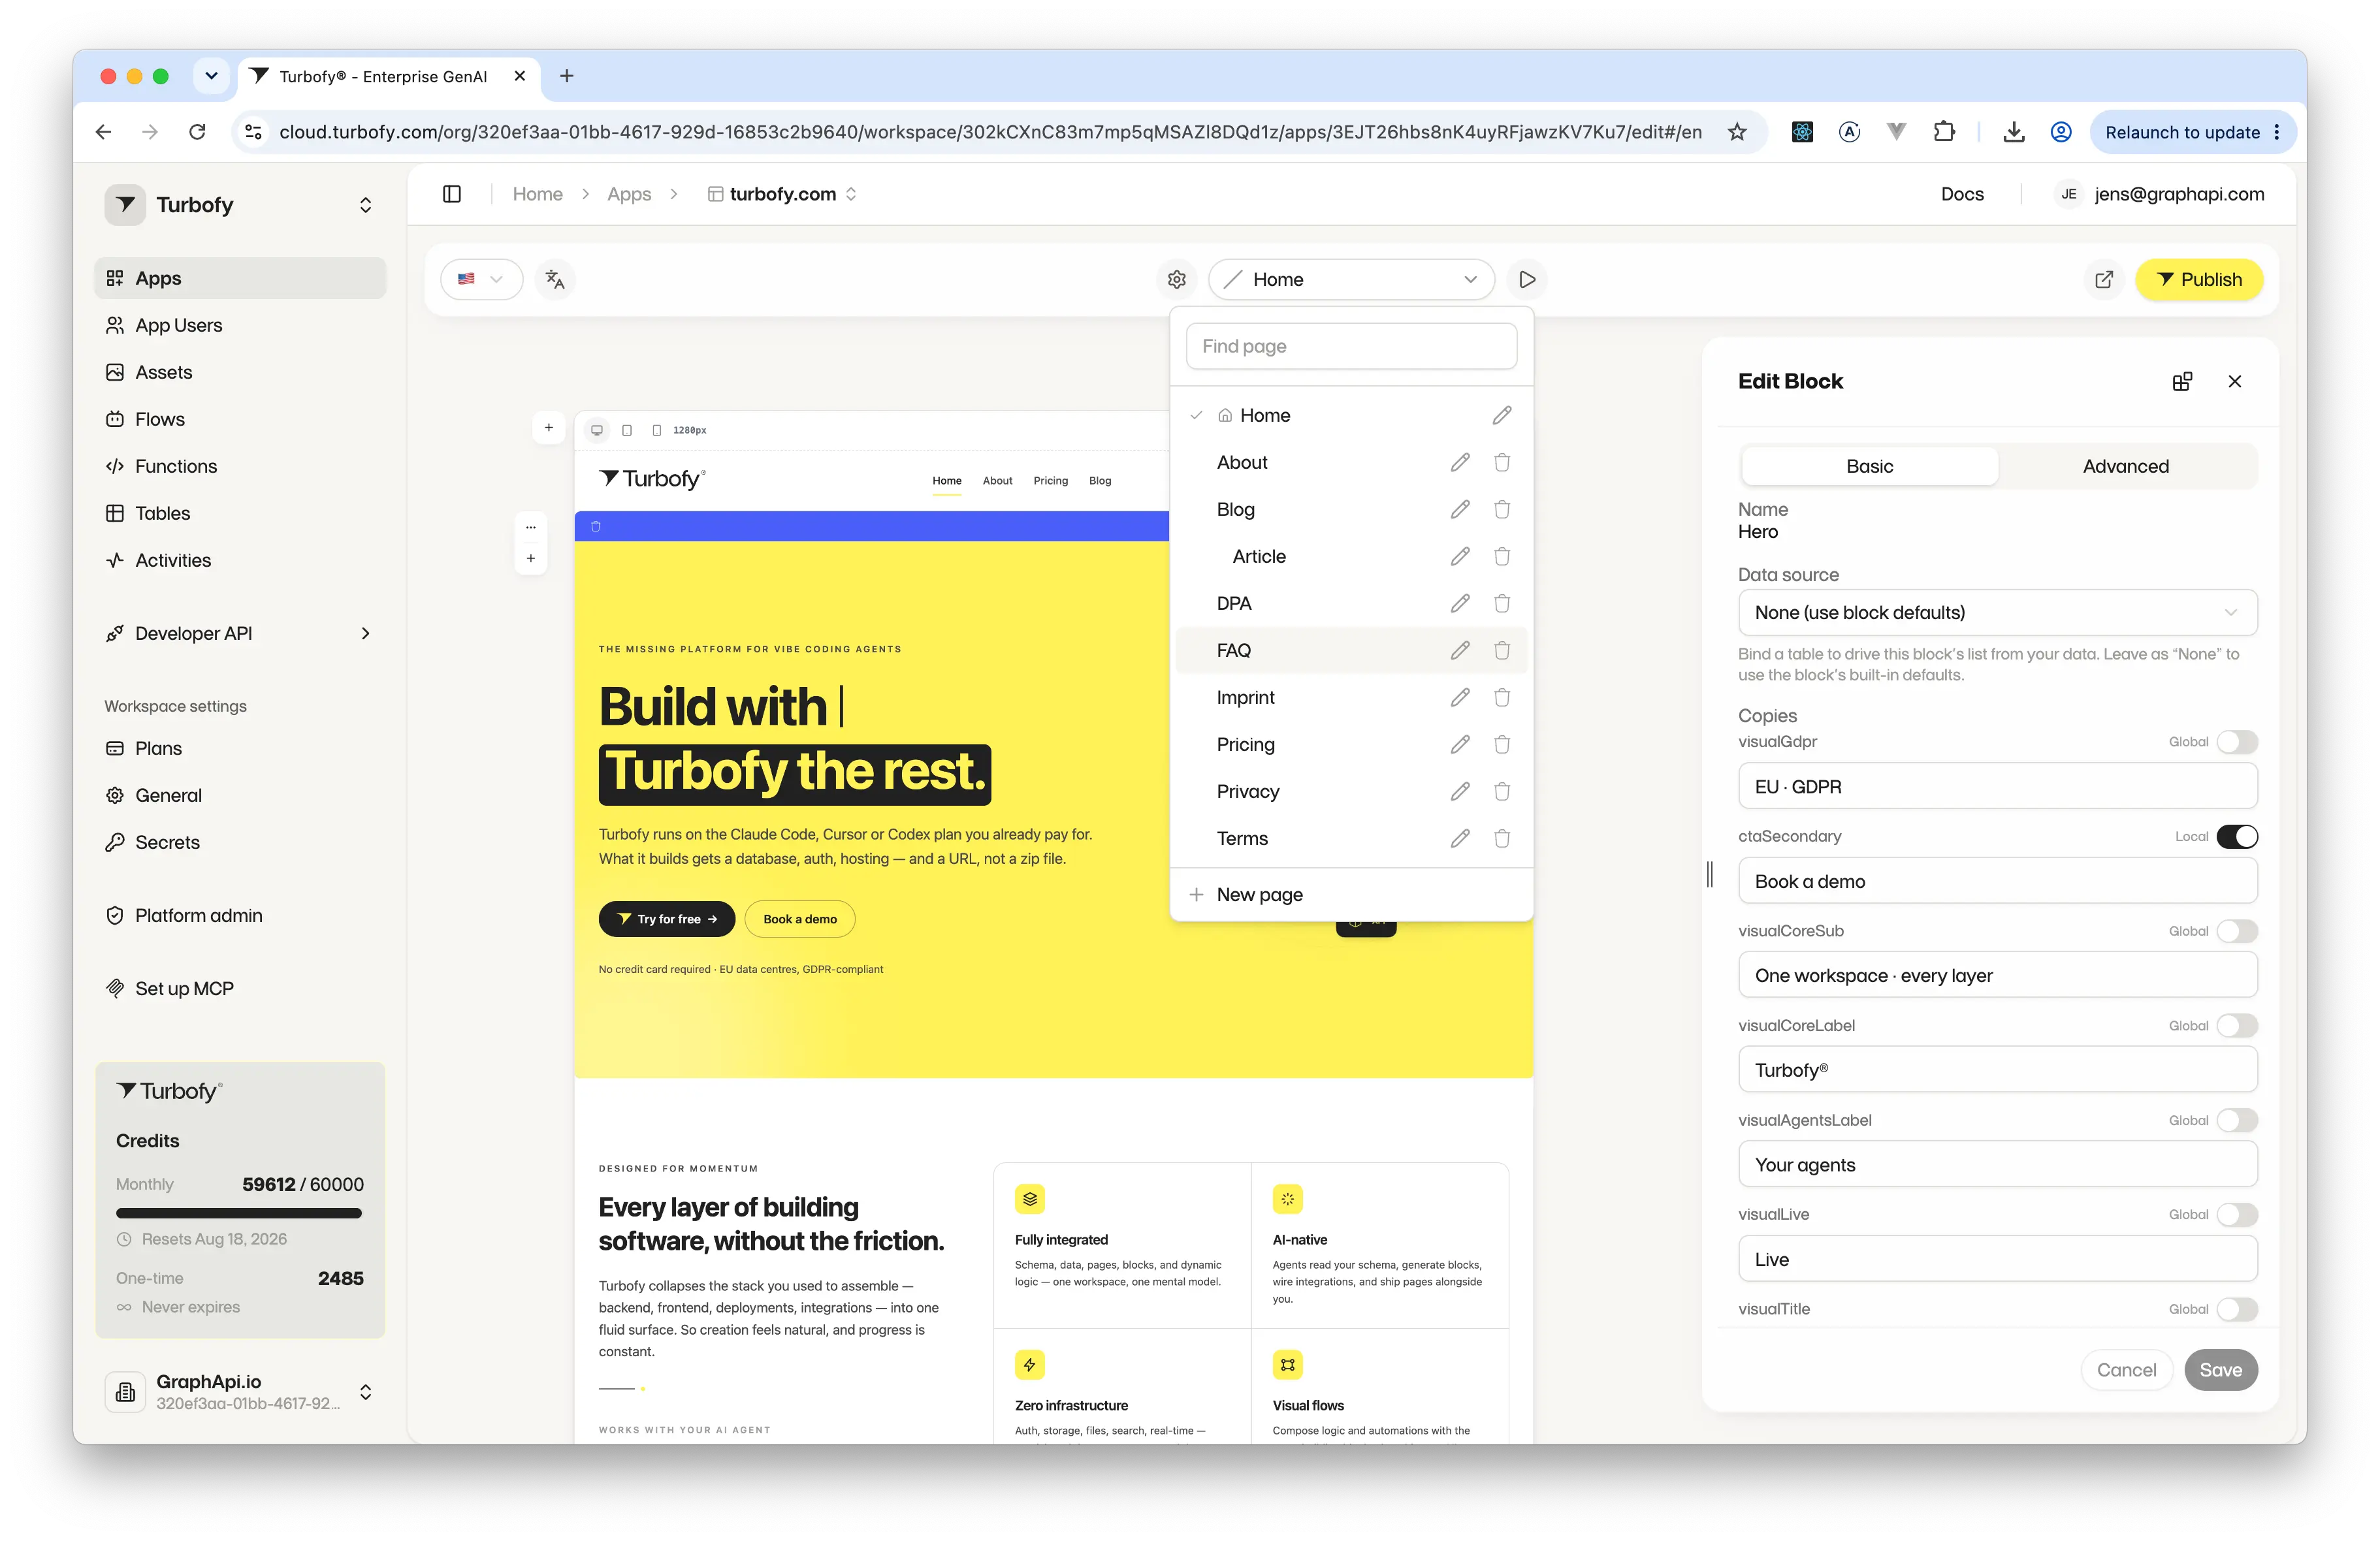
- The dropdown in the toolbar switches pages, searches them by name, and adds new ones with
New page. - The canvas renders the real page — switch between desktop, tablet and phone widths to check how it holds up.
- Hover the canvas to insert a block above or below the one you are pointing at, or click a block to open
Edit Block. - The play button opens the page you are editing in preview.
Publishmakes the current state of the app live at its public address.
The Edit Block panel
Basic covers the two things you change most often. Data source binds the block to a table so it lists your records — leave it on None and the block falls back to its built-in defaults. Copies below it holds the block's text, one field per key.
Every copy carries a Global / Local switch. Global wording is shared by every placement of that block type; flip a key to Local and only the block on this page changes — that's how the same block can read differently on two pages.
Advanced is where a block's configuration and server-side data go, for the cases the Basic tab doesn't cover — see Building blocks.
Pages are screens
Each page is one screen with its own web address. You give a page a name and a short address, and you can nest pages underneath one another to group related screens — handy for menus and sections.
- Add pages from the page switcher with
New page— a name, an optional parent, an access level, and a URL segment that defaults to the slugified name. The pencil beside a page reopens those settings; the bin deletes it. - Nest a page under another with
Parent pageto build a hierarchy — nested pages sit indented under their parent in the list. - Some pages are templates that show a different record depending on the address — for example one "article" page that can display any article.
Addresses & redirects
A page's address is edited in the Slugs tab of the Localization dialog — one entry per page, per language. Template pages list a row for every record they can show, so each article or product gets its own readable address underneath the page's shared prefix.
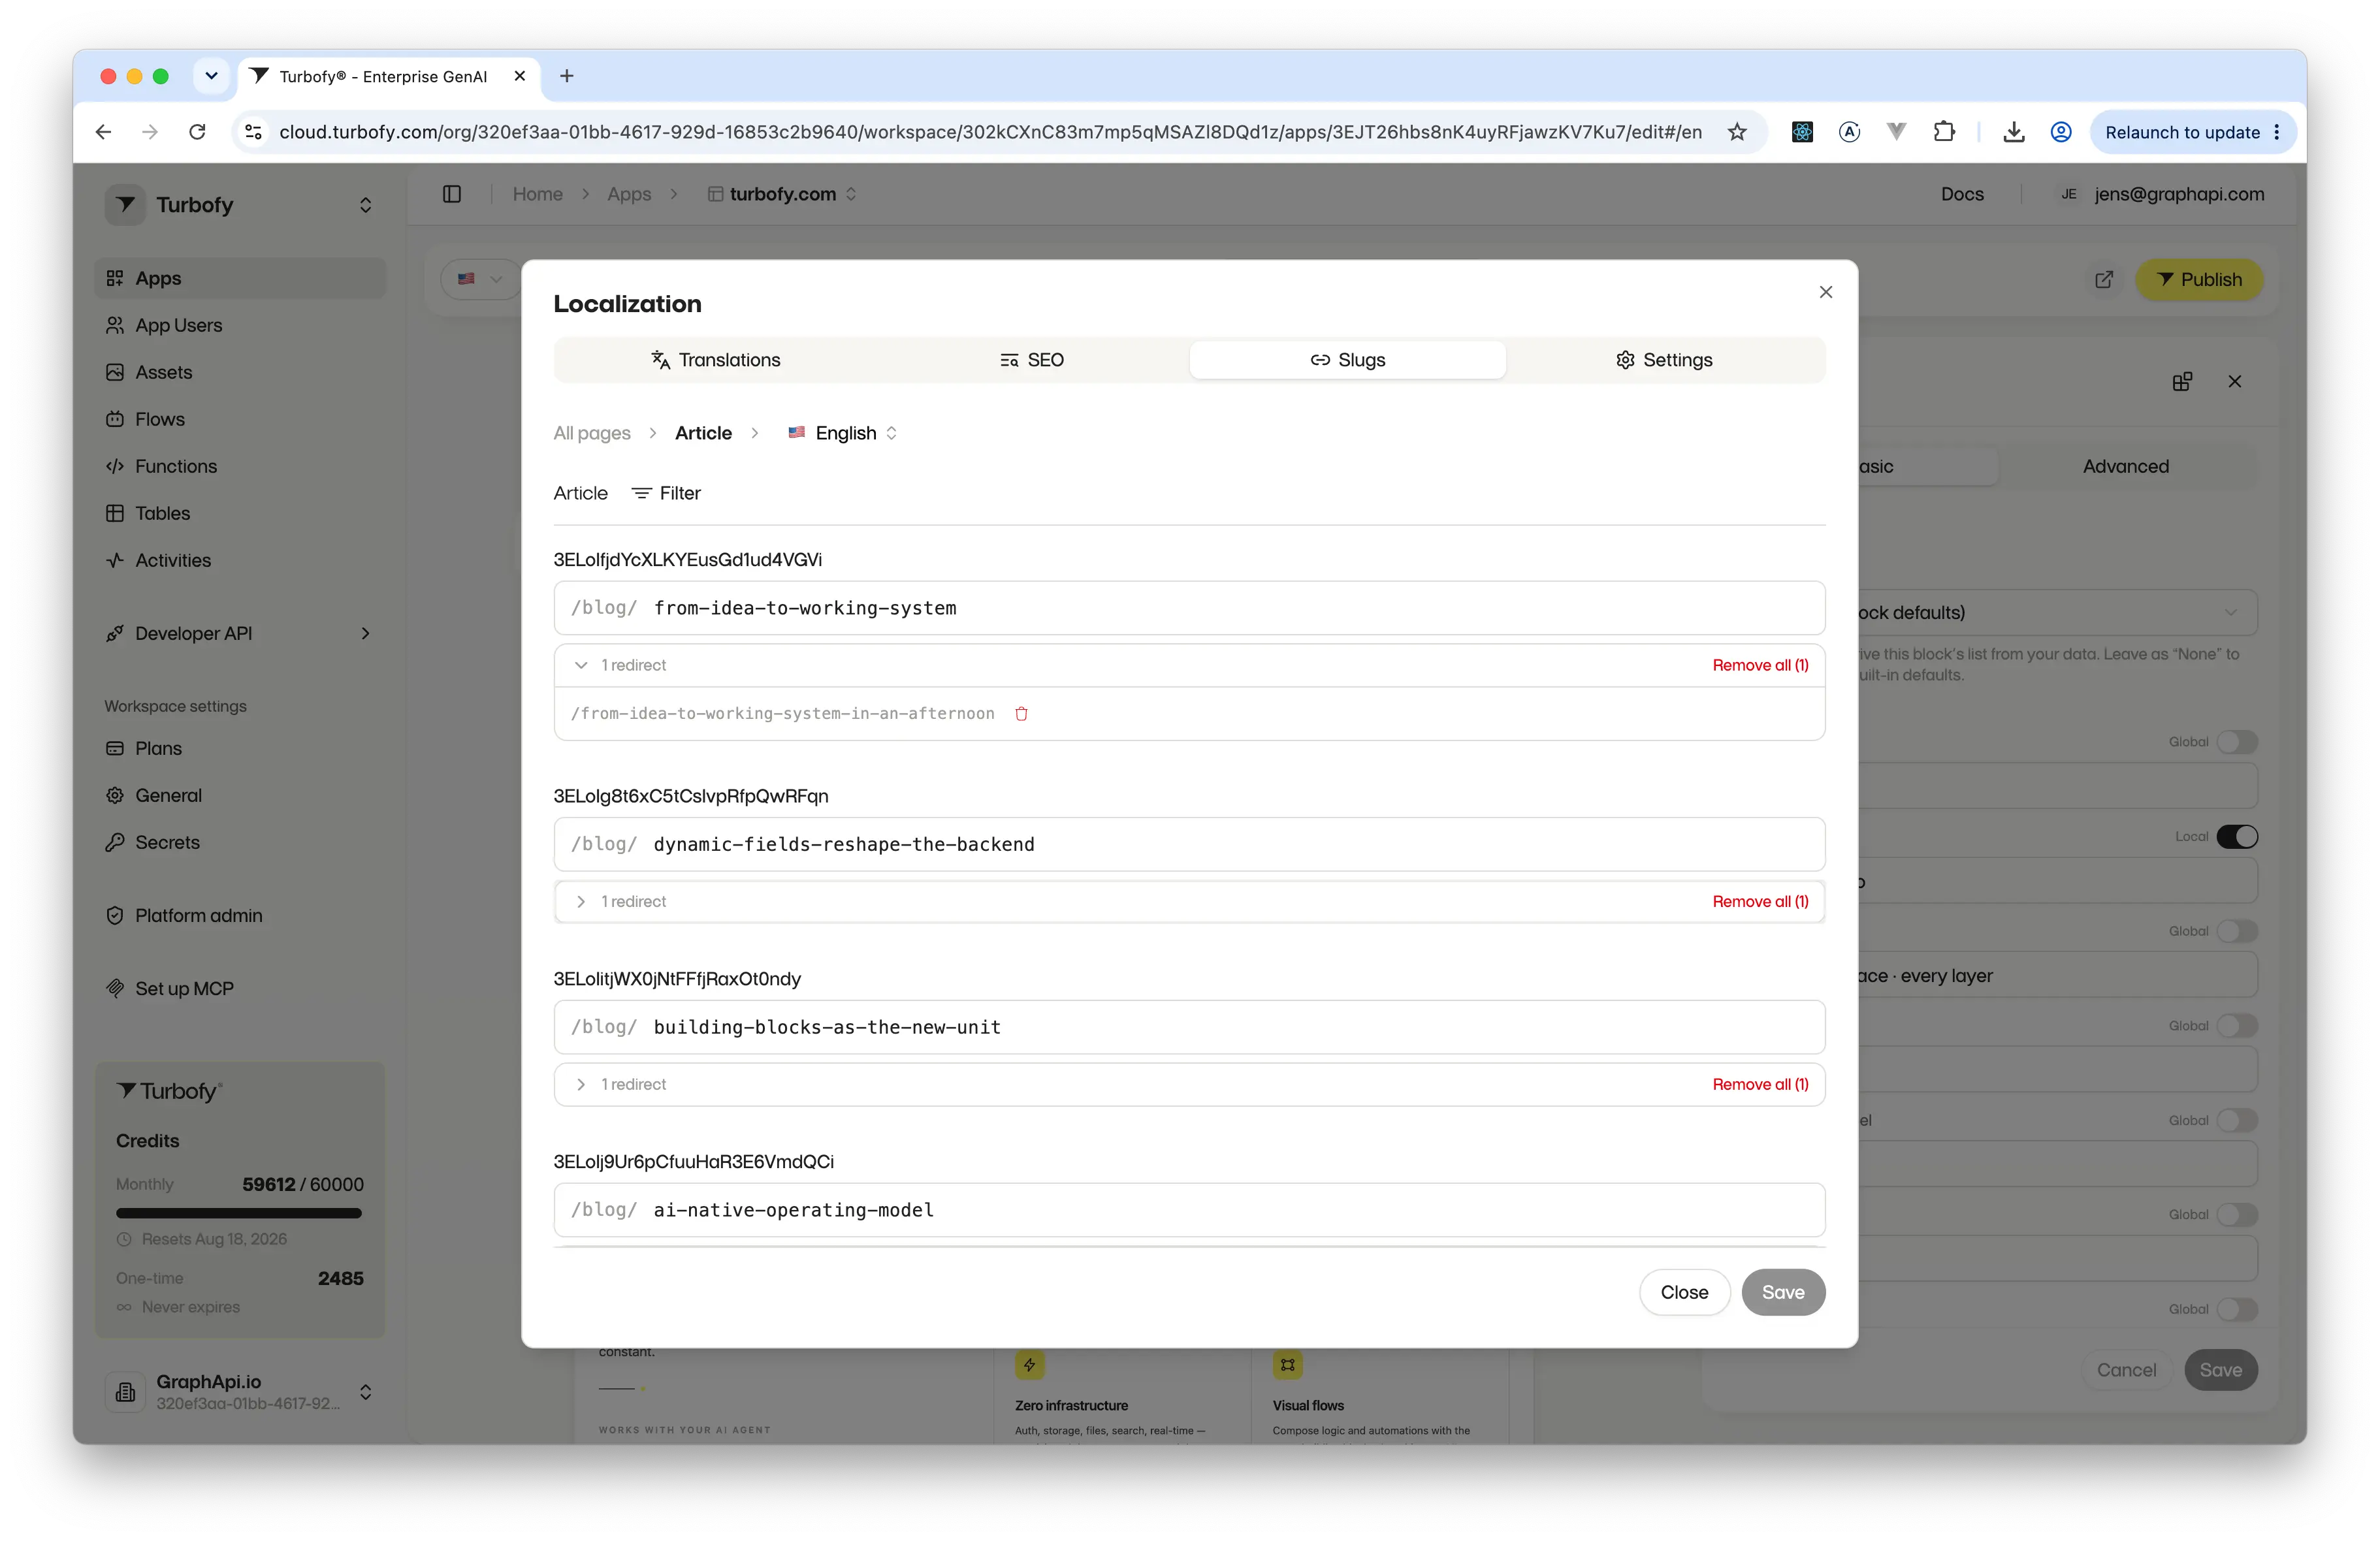
- Filter the list by name when a template page has more rows than you can scan.
- When a slug changes, the previous address stays behind as a redirect, so links already out in the world keep working.
- Expand
1 redirectto see what points here — drop a single entry, or clear them all withRemove all.
Removing a redirect breaks every link that still uses the old address. Leave them in place unless you are certain nothing points at it.
Content & translations
The Translations tab of the same dialog gathers every piece of text in the app, grouped by block. Each block owns a dictionary of keys — headline, lead, eyebrow — holding one value per language, and structured entries such as a list of cards or steps open in a small JSON editor.
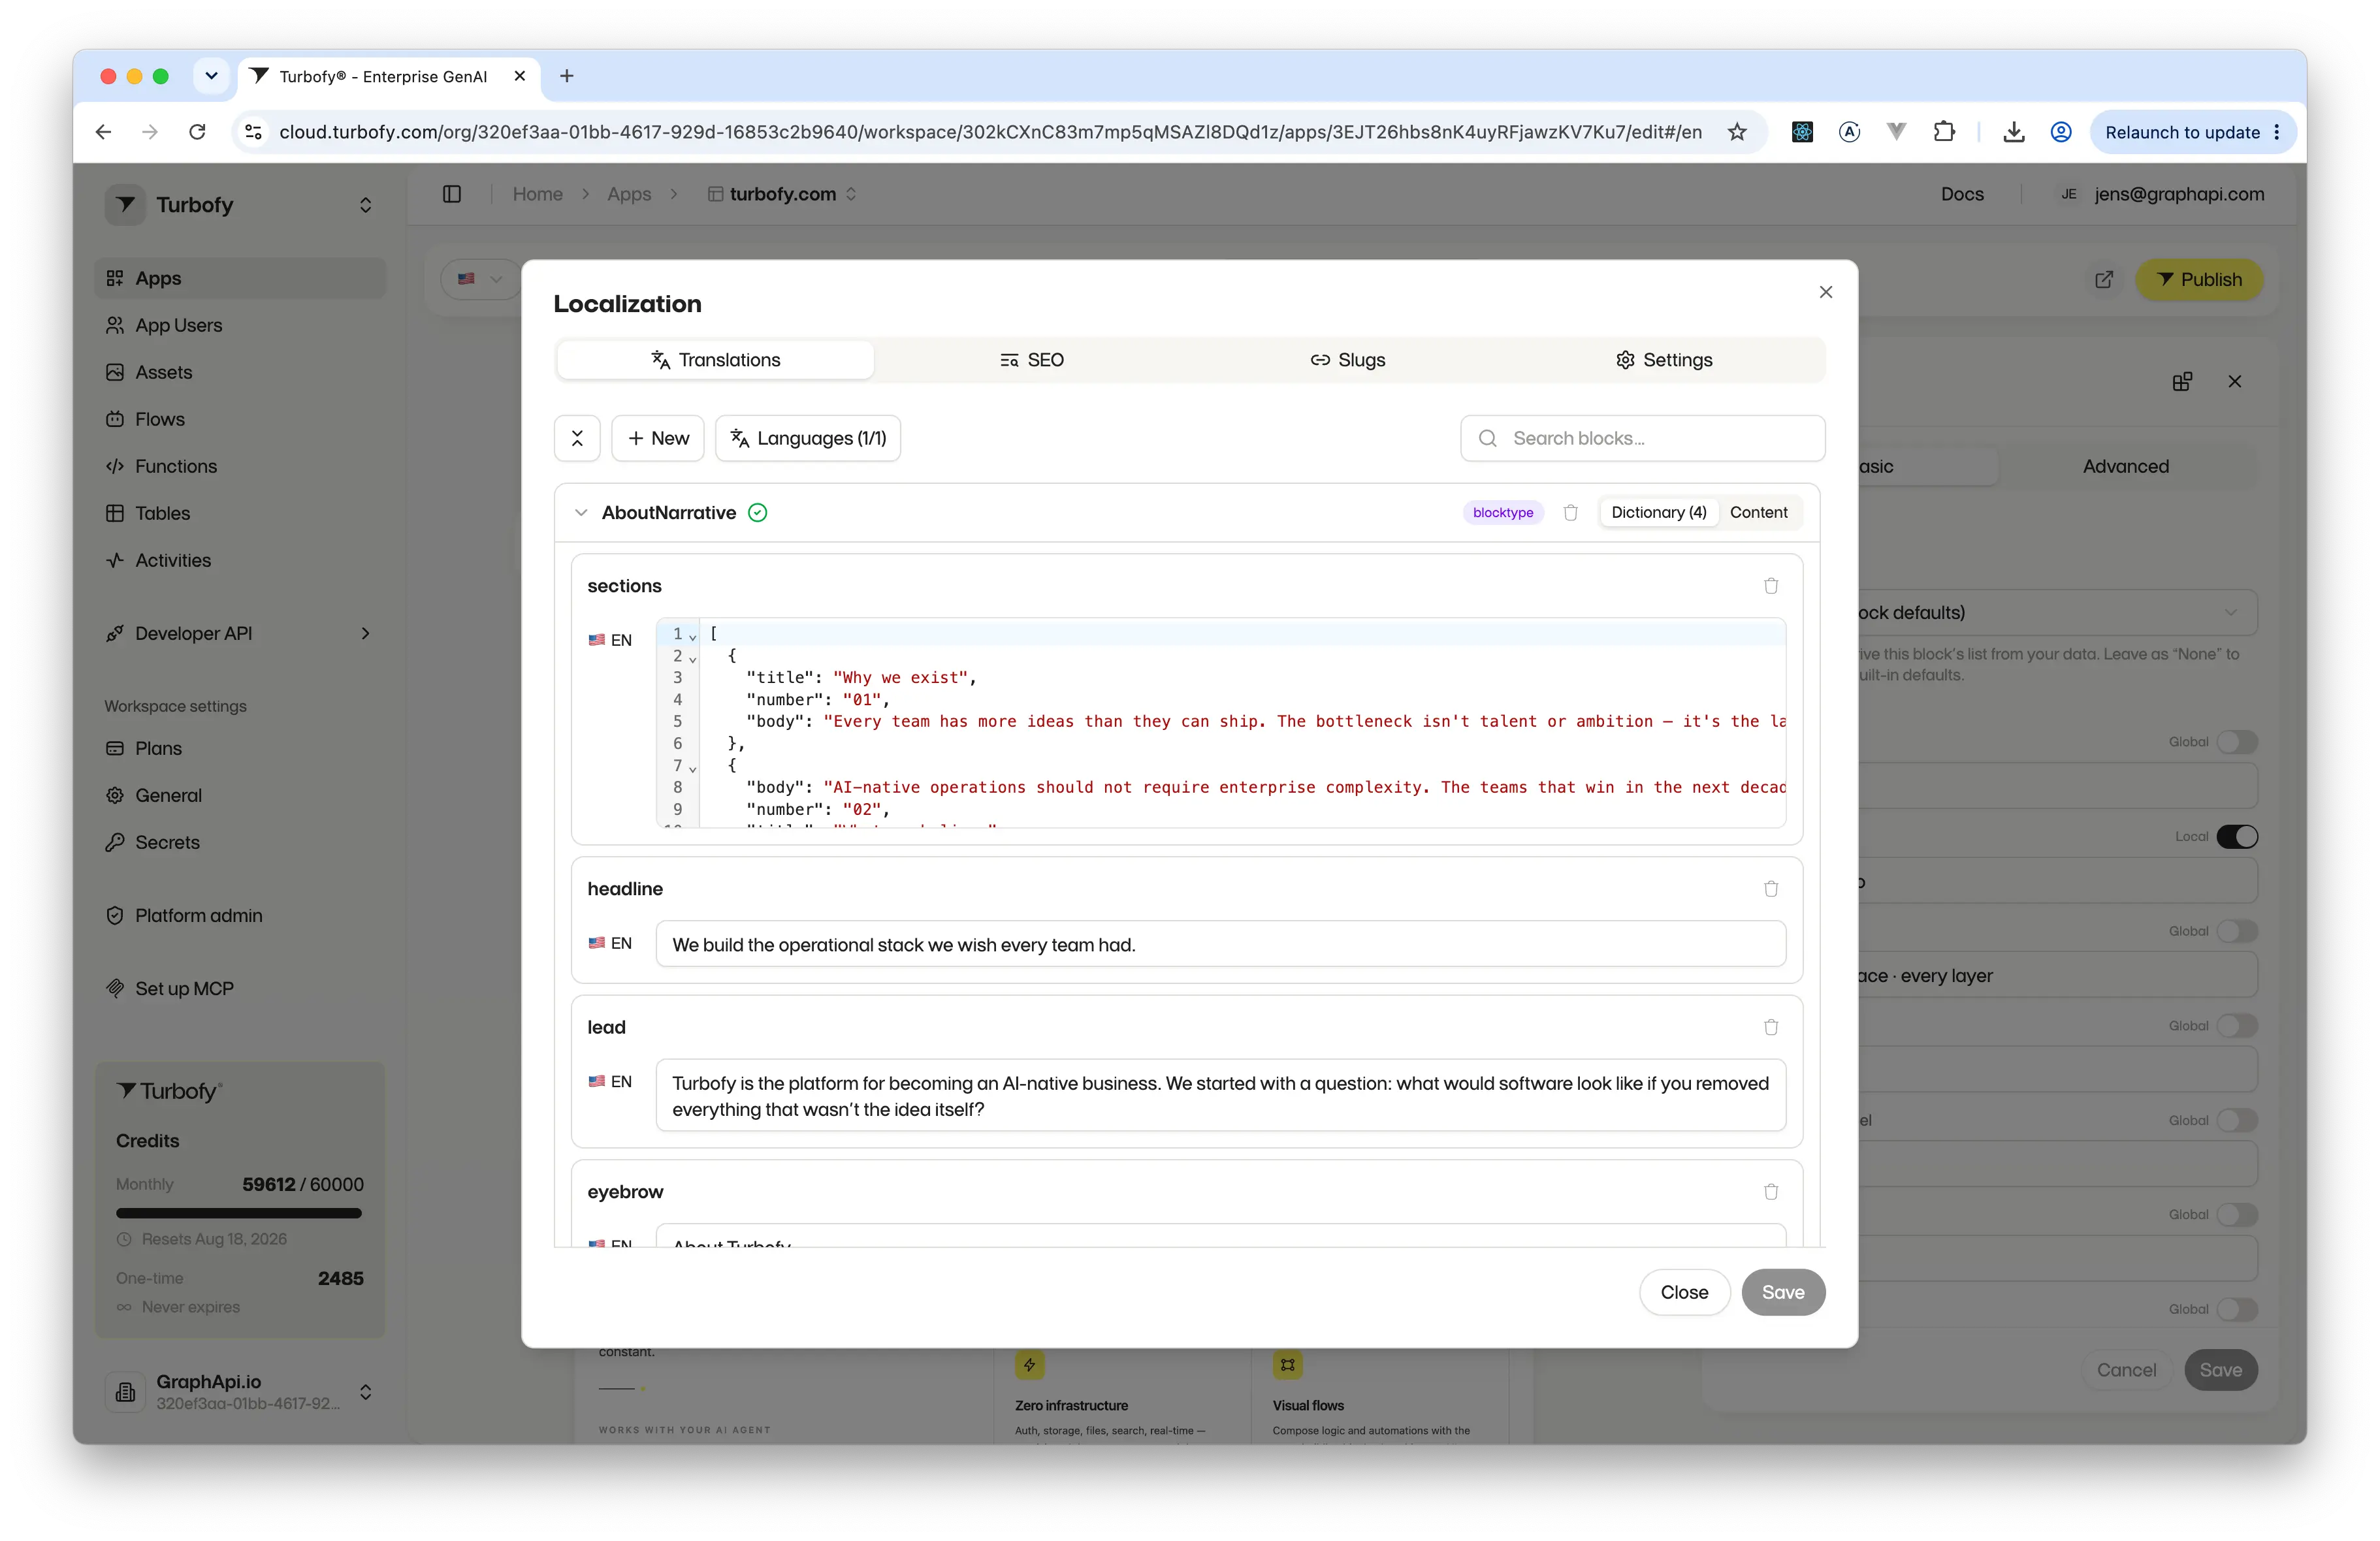
- Search by block name to jump straight to the wording you want to change.
Languagescontrols which of the app's languages are shown while you edit.Newadds a key to a dictionary; the bin beside a key removes it.
This dialog has four tabs — Translations, SEO, Slugs and Settings. For how languages, defaults and fallbacks behave, see Localization.
Inside the dashboard vs. published
By default your app runs inside Turbofy for you and your team, with access to all your workspace data — that's preview mode, and for an internal tool it may be the only mode you ever need. When you're ready, a public app can be published as a standalone website anyone can visit.
Publishing is the Publish button in the editor. Once an app is live, its card on the Apps screen carries a Published badge and the address it answers on.
The public part of a published site shows data from the tables you've marked as public. Anything else stays behind a sign-in — or stays invisible.
Private data cannot leak onto a public page. Every read is filtered by Turbofy's permission layer before records leave the database, so a private table wired onto a public page simply comes back empty — the section renders with nothing in it rather than exposing rows.
Private pages & app users
A published app doesn't have to be public from end to end. Switch authentication on and visitors can sign in: pages you mark as private are served only to signed-in users, and their accounts live under App Users in the workspace. It's how one app can carry a public front and a members-only area behind the same domain.
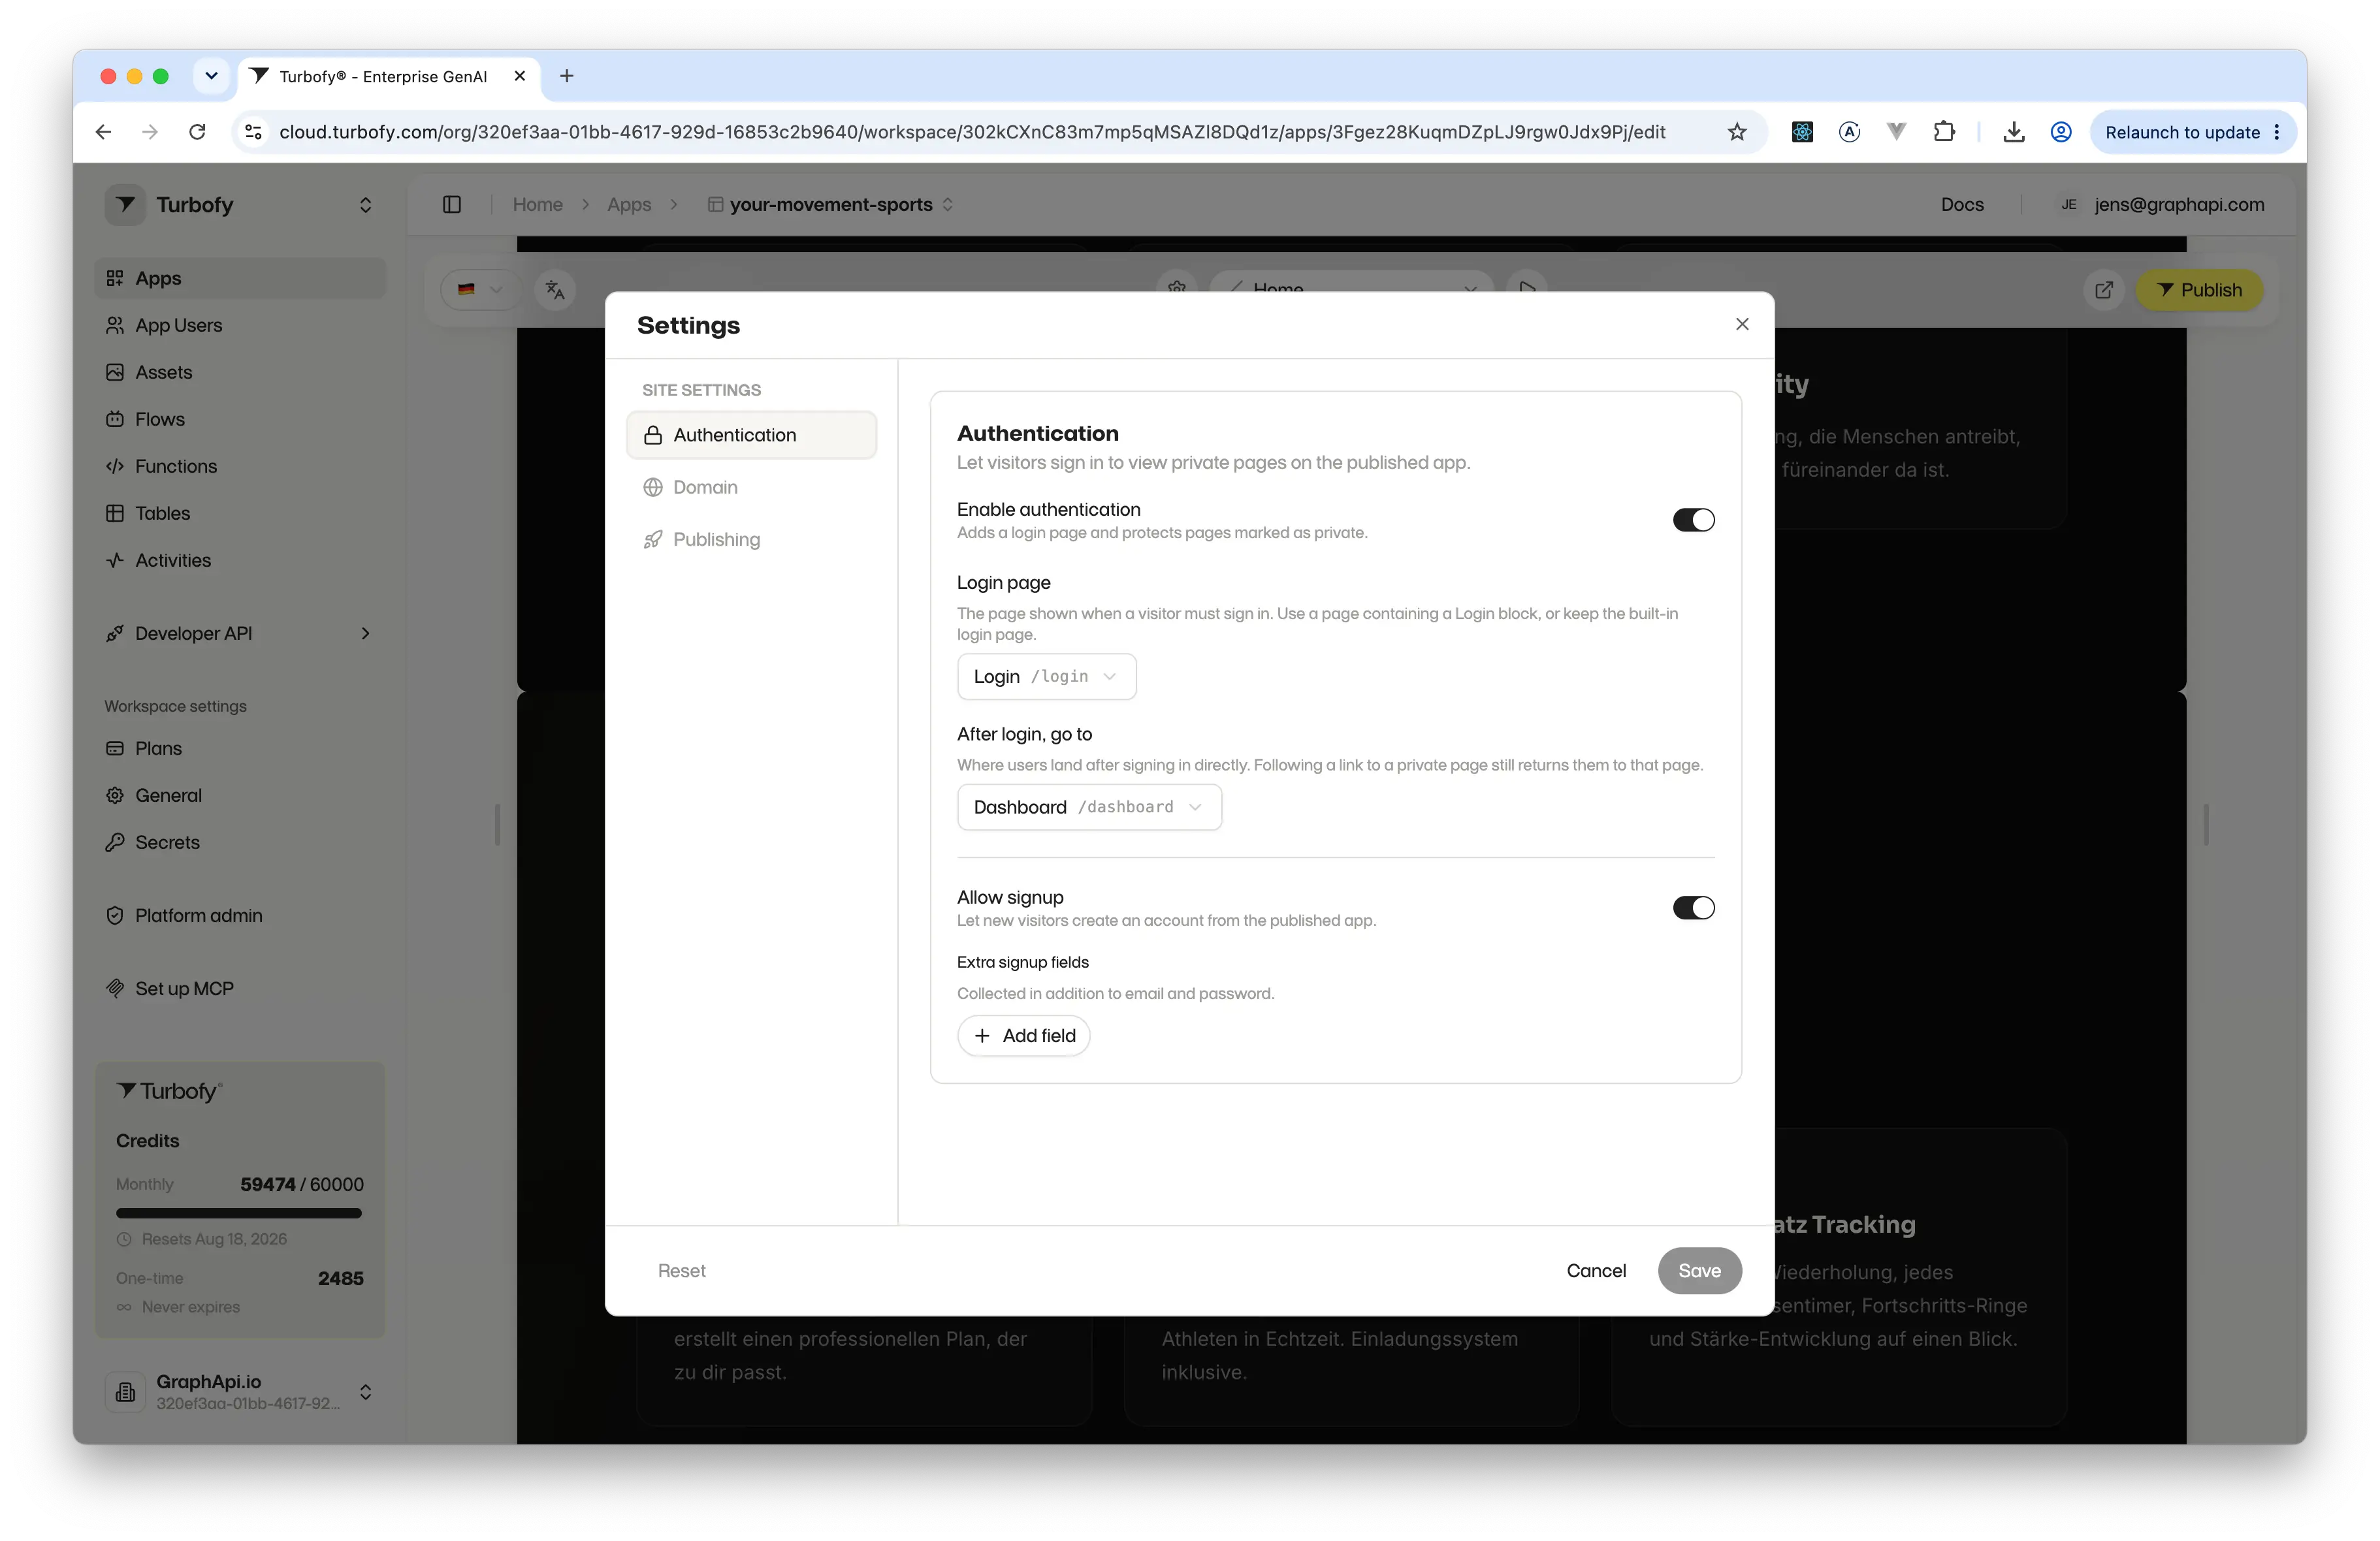
Authentication in the app's Settings, alongside Domain and Publishing.Enable authenticationadds a login page and protects every page marked as private.Login pagechooses what a visitor sees when they must sign in — your own page containing a Login block, or the built-in one.After login, go tosets where people land when they sign in directly; someone who followed a link to a private page is still returned to that page.Allow signuplets new visitors create an account themselves, andExtra signup fieldscollects more than just an email and password.
Page access levels
Access is a property of the page itself. You pick it when you create the page, and you can change it later from the same settings — so a page can move between public and private long after it went live.
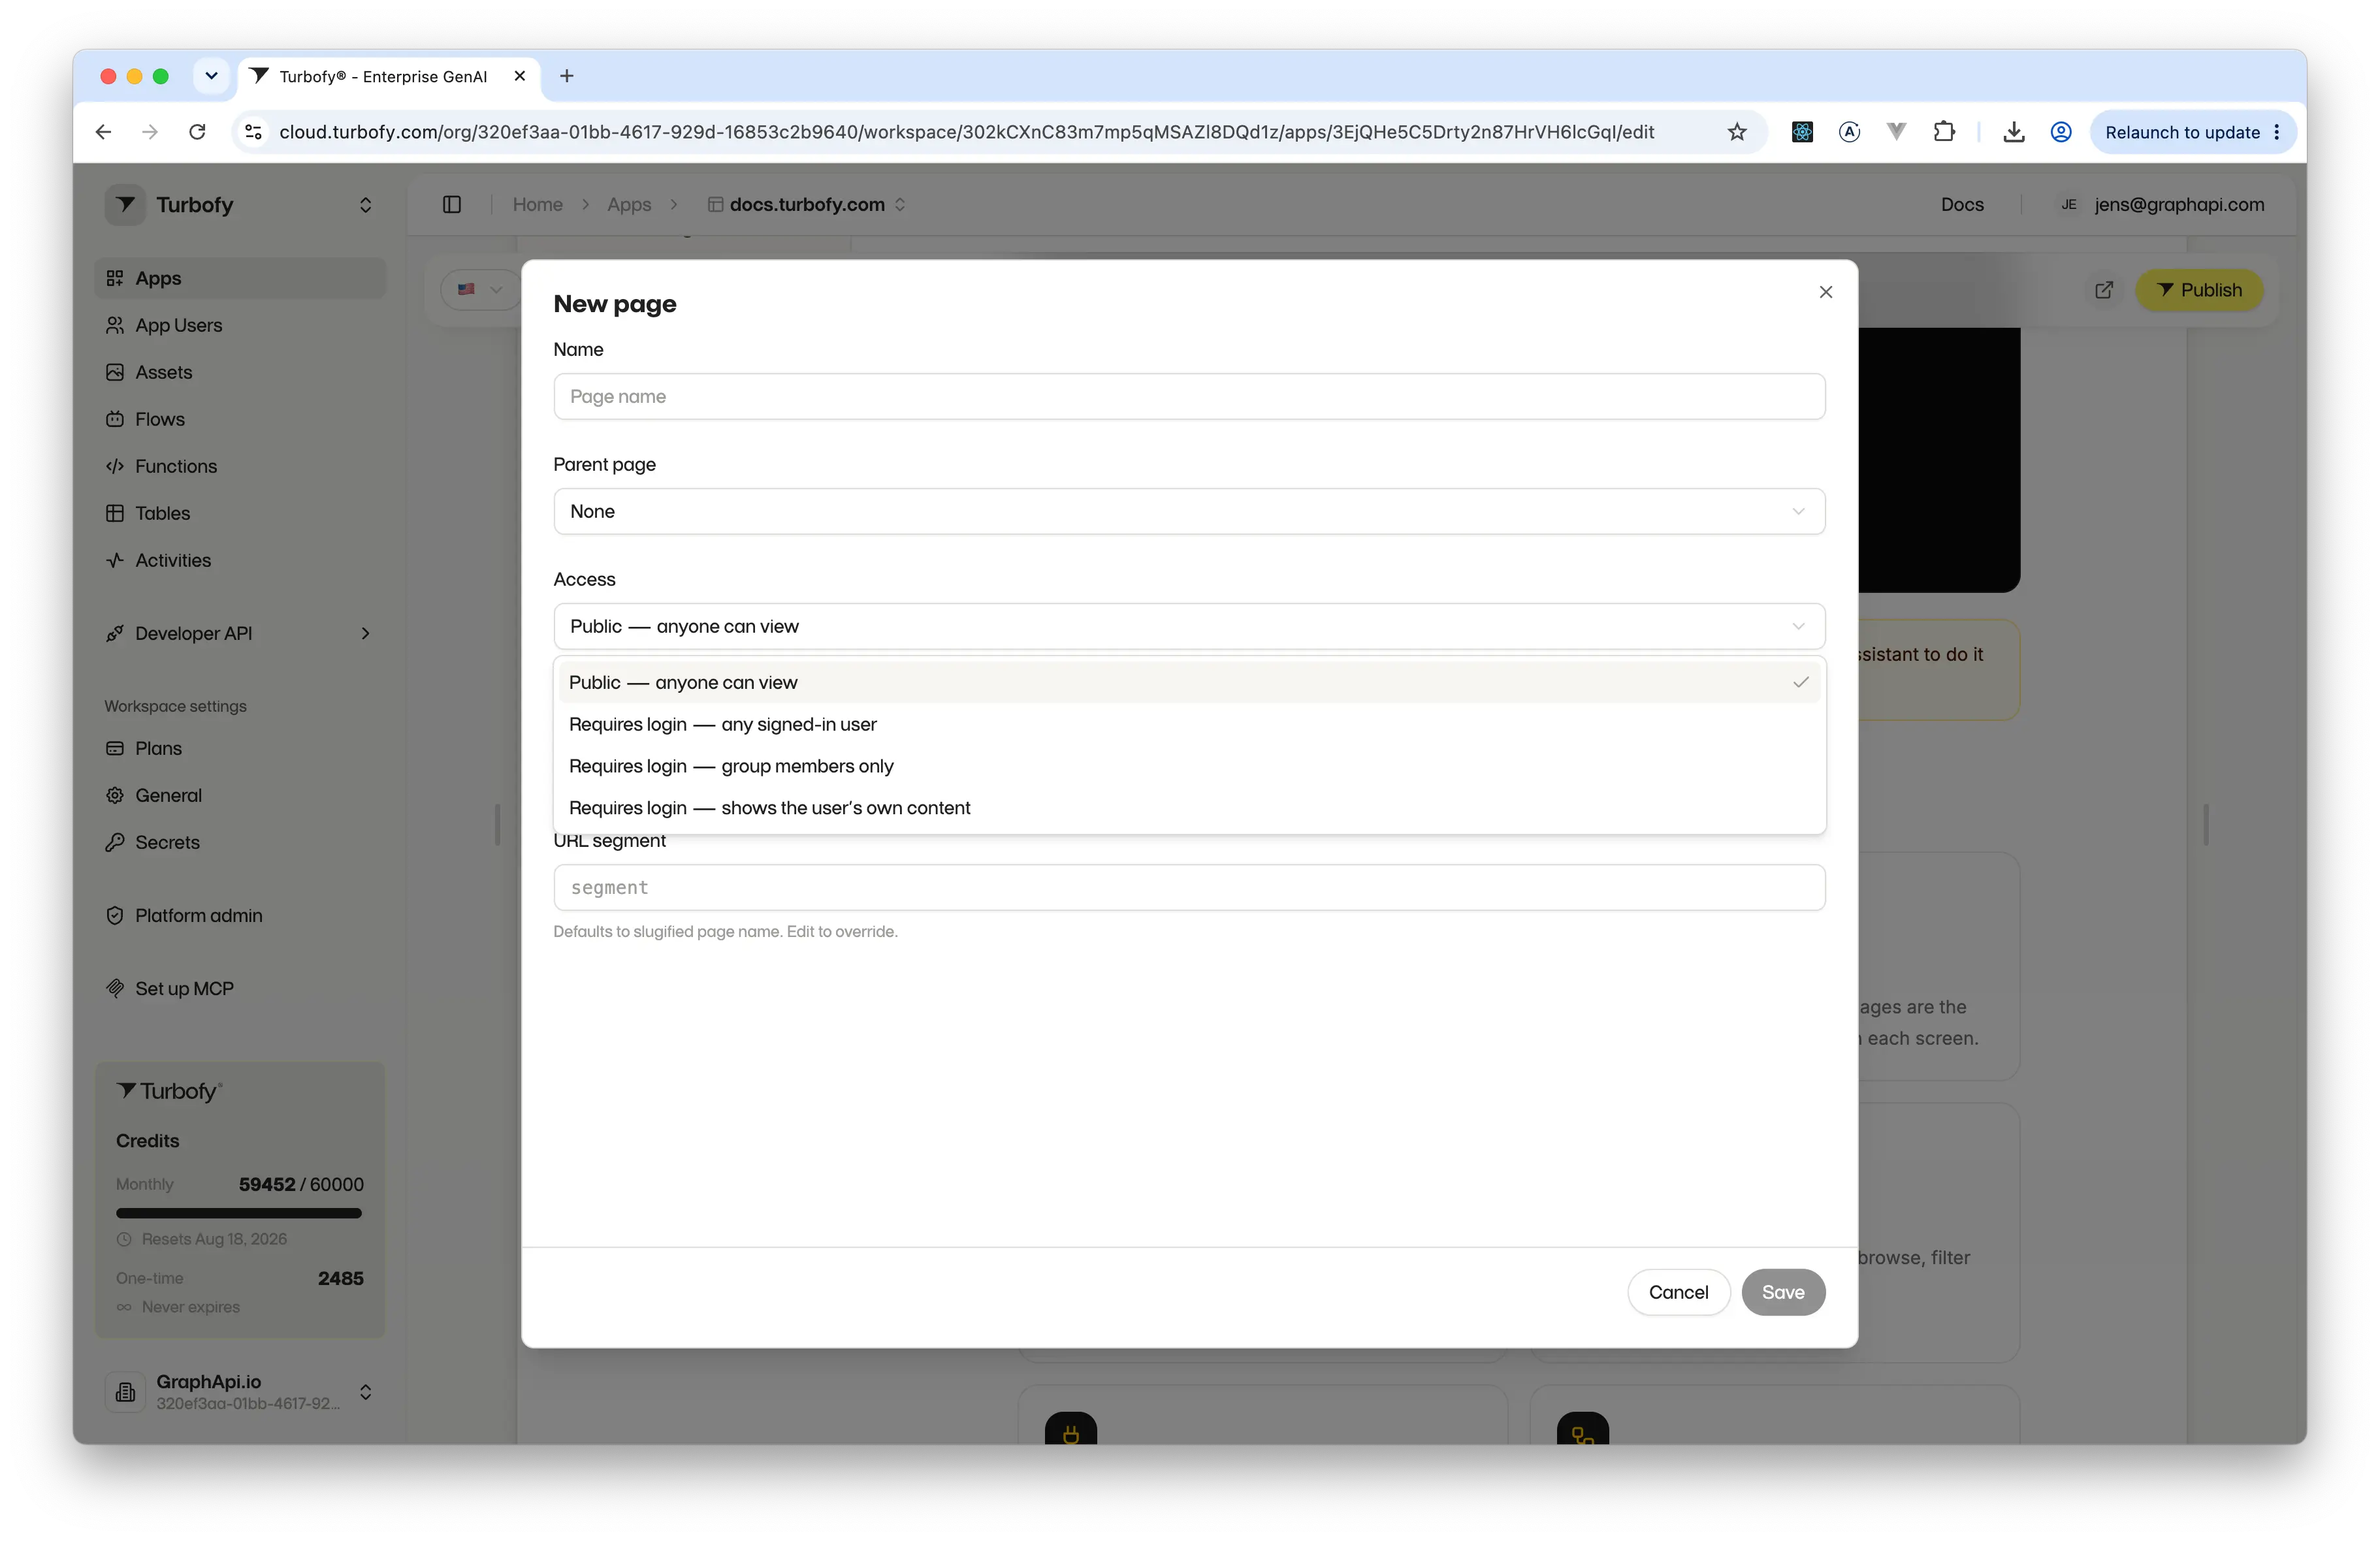
Access in the New page dialog — the same setting reopens with the pencil beside an existing page.Public— anyone can view the page.Requires login — any signed-in user— open to every visitor with an account.Requires login — group members only— narrowed further to the groups you allow.Requires login — shows the user's own content— the page renders each visitor only their own records, which is what a profile, an order history or a personal dashboard needs.
Because access is enforced on the data itself, a private page is genuinely private — there is no version of it that renders someone else's records to a visitor who isn't signed in.